I’ve now reglued my Libelle glider’s wings since my last crash, and while I have the covers off I thought I’d take the chance to post about the electronics I’m using.
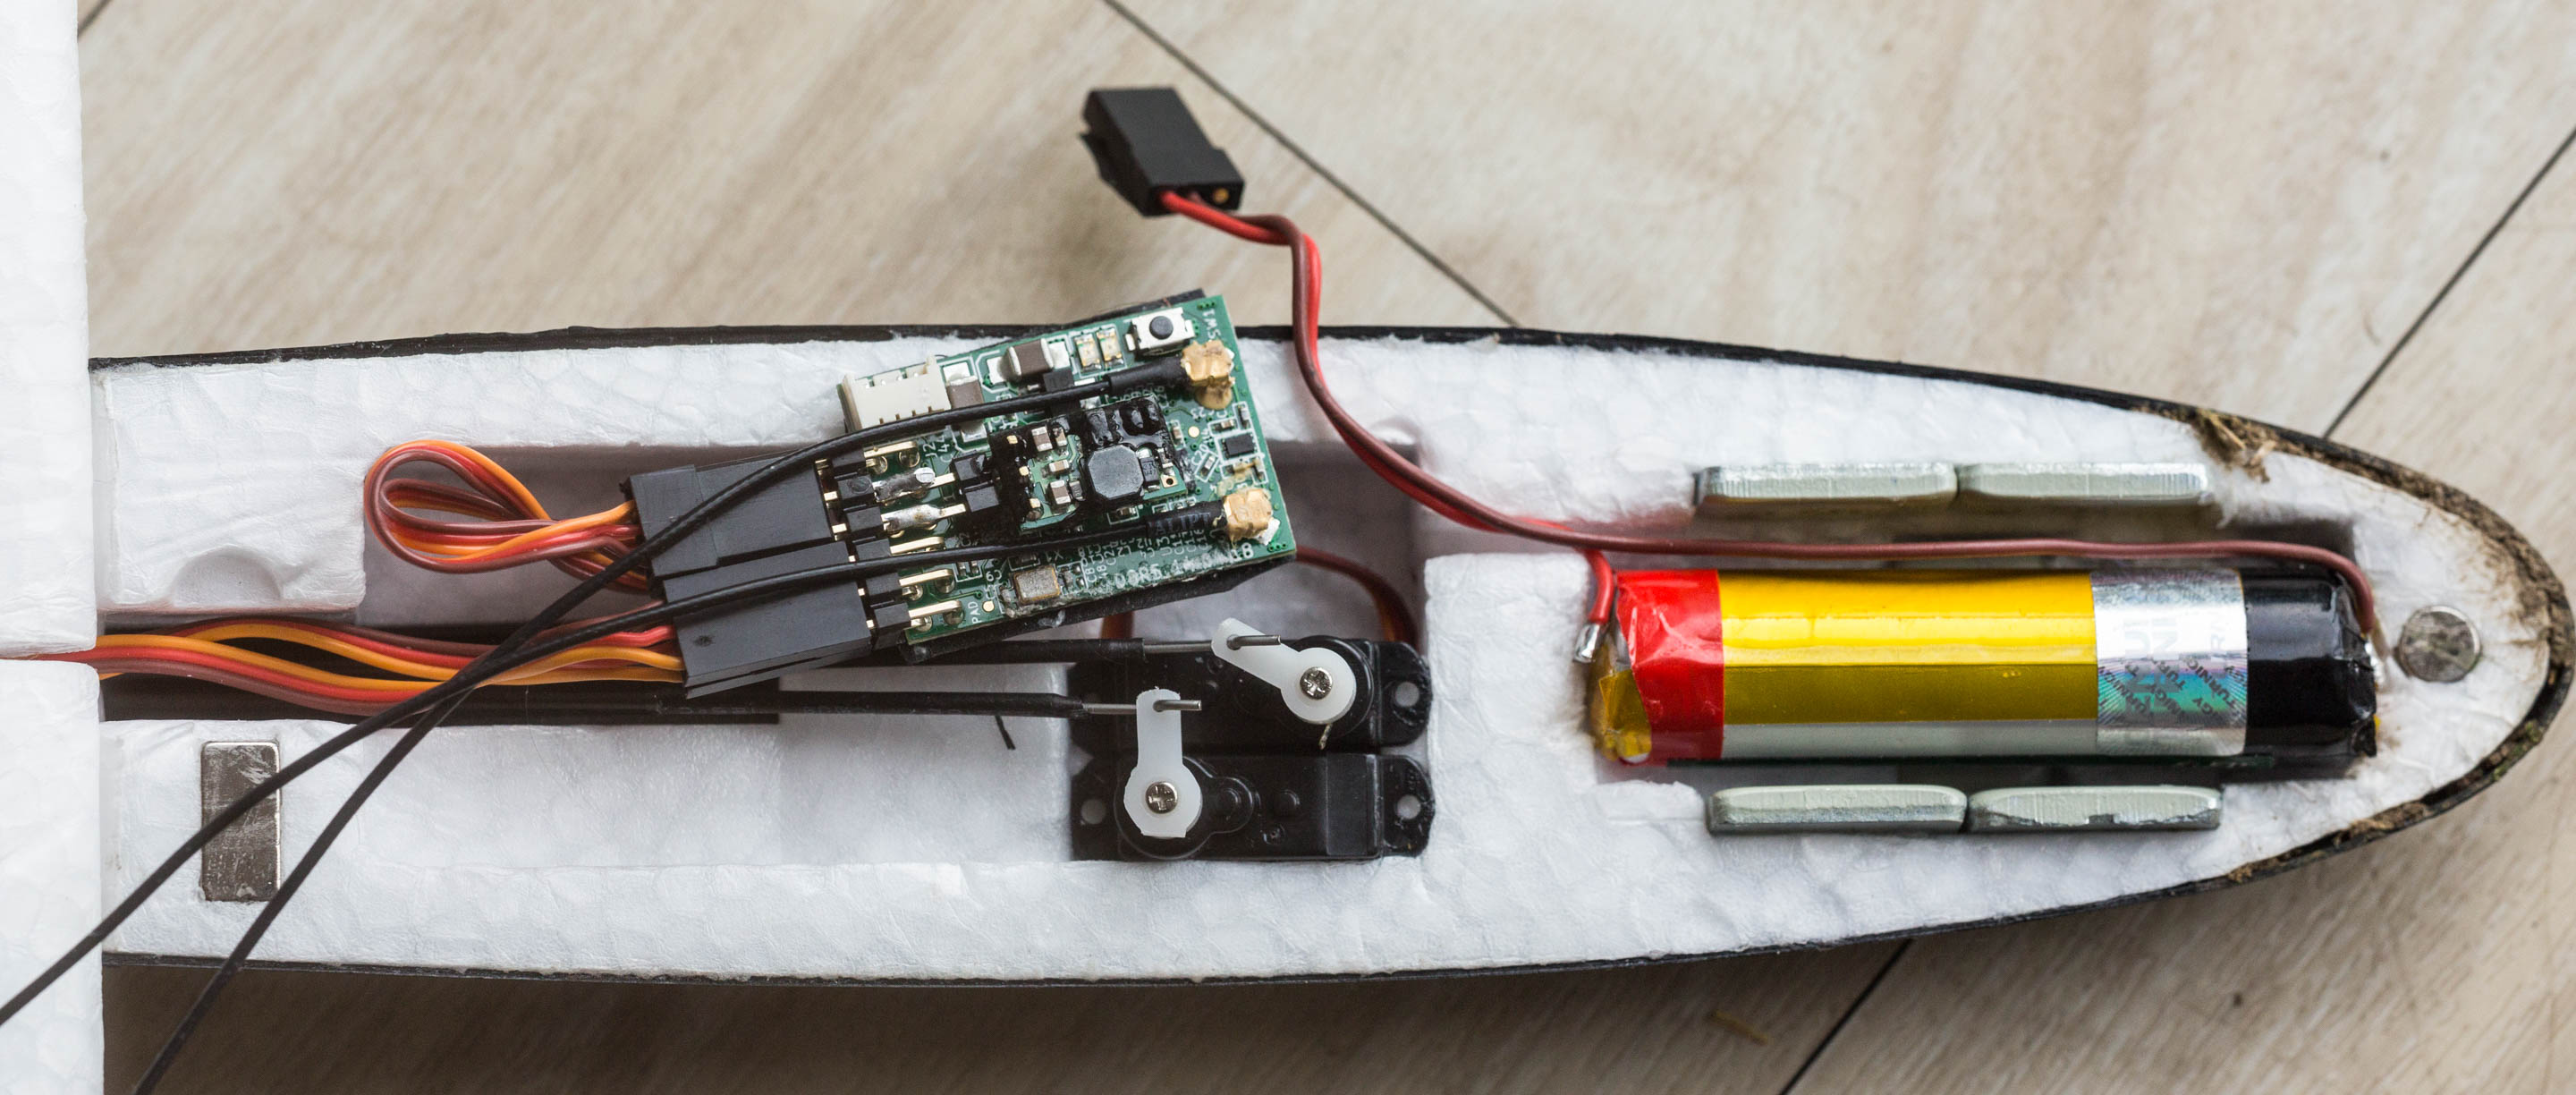
I’m using the stock Dream-Flight servos, which I’ve been happy with. They do jitter a little bit, but I suspect this is mostly due to my transmitter/receiver. I shortened the servo cables for the elevator and rudder, and produced my own servo extension cables for the ailerons using the Pololu Crimping Tool to terminate the cable. With a little practice, this crimping tool (along with female & male crimping pins and connector housings) produces a strong, secure bond that I’d trust just as much as those on commercially produced servo cables. This allows you to avoid your control rods in the front pod binding on a tangle of cables by making the cables just the right length.
Instead of the stock 300mAh 4.8V NiMH battery, I’m using a Turnigy 1200mAh 3.7V 1S round LiPo from HobbyKing. This weighs less than the stock battery (23g vs 31g) but the capacity is much greater (4.4 watt-hours for the LiPo versus 1.4 watt-hours for the original). This gives me flight times exceeding 4 hours on a single charge, versus about one and a half hours on the stock battery. This is great because with the old NiMH I had several days of flying where the battery ran flat in mid air and I still wanted to keep flying. Now the battery outlasts me!
I took a servo extension cable, cut off one end, and soldered it onto the positive and negative battery tabs as shown, which accepted the solder readily without using special solder or techniques. I soldered the other half of the servo extension to a XT-60 plug in order to create a charging cable to plug into my Accucel charger.
The round cell is a little bit too long and tall to fit into the original foam cavity. I used a knife to remove the foam fillets from the battery bay floor at either end to accommodate the length, and dug down a few millimetres to accommodate the extra height. The pod lid now closes perfectly!
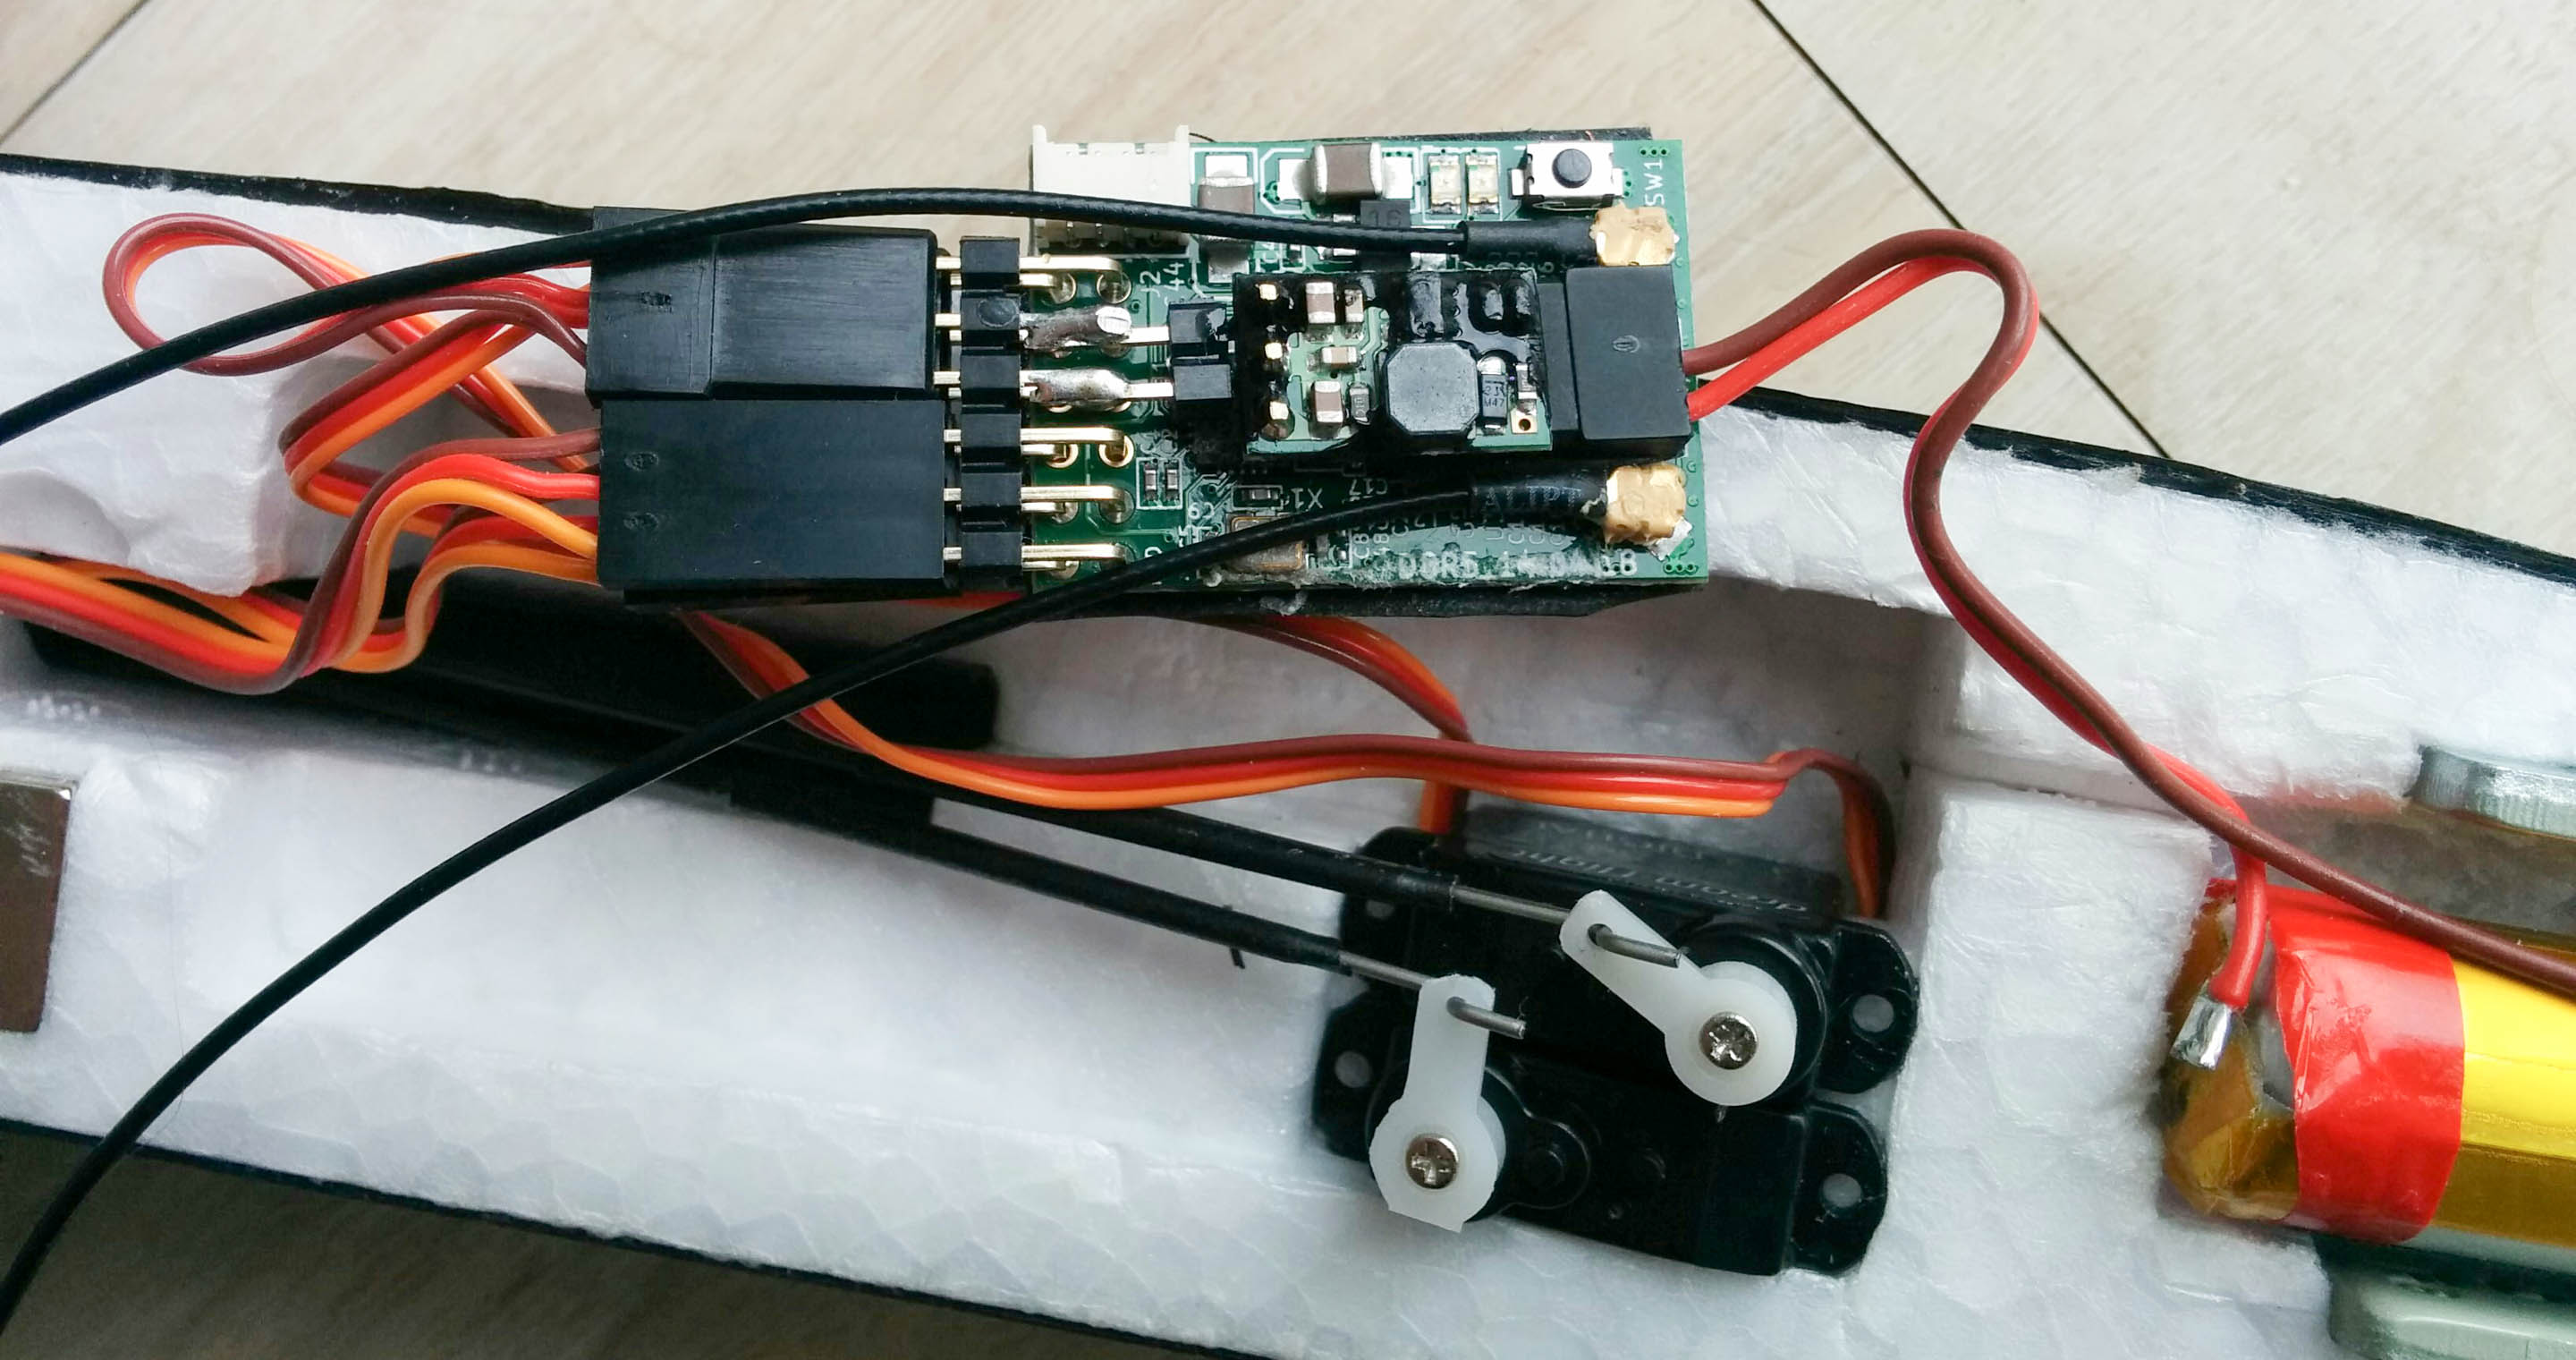
My receiver is a FrSky D4R-II, which has 4 channels and works down to 3.5V. In theory this could be powered by a single LiPo cell, but since I know how much the battery voltage can sag when the servos are operating, I didn’t want to chance it.
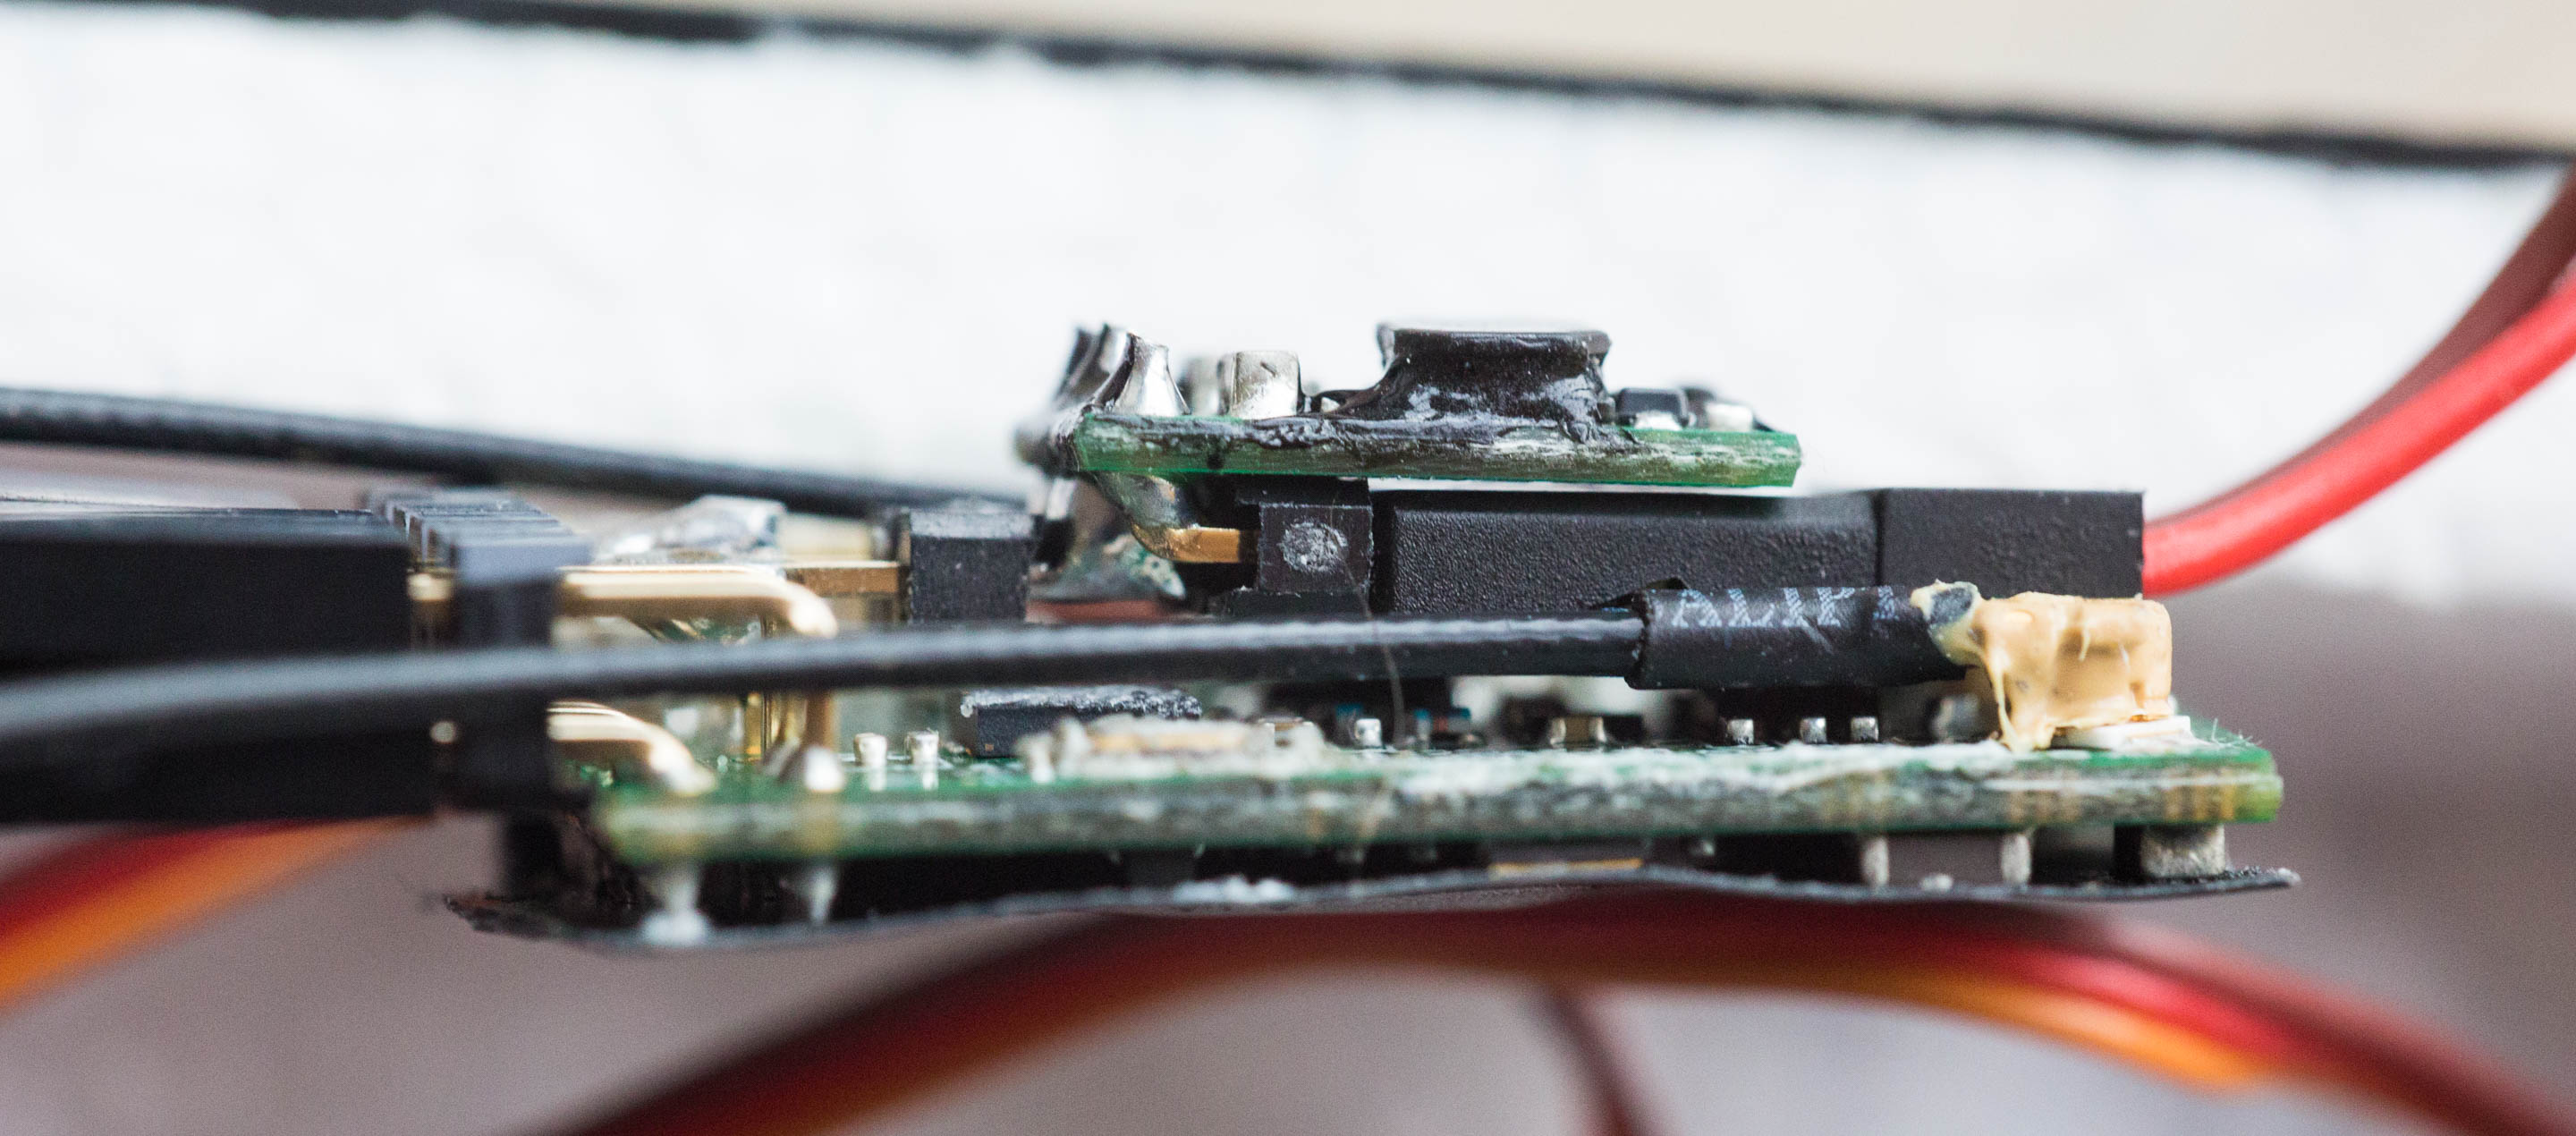
In order to give me a place to inject power (since all 4 channels are already occupied) I soldered 2 pins from a 0.1″ straight pin header onto the back of VCC and GND pins on the D4R-II’s right-angle header. These two pins in turn are soldered onto the back of the right-angle header of a Pololu 5V Step-Up Voltage Regulator (U3V12F5). This regulator boosts the voltage from the 1S LiPo into a nice steady 5V supply that the servos and receiver will work optimally with. Here’s a top view showing the battery plugged in to the regulator:
And a side view:
The manual says that the iron balance weights should be secured with double-sided tape and/or painters tape, and the battery should be secured with hot glue. I found that the glue was a poor solution for holding the original battery and would let go during a crash or on takeoff and eject the battery. Once the battery was ejected, I didn’t have a hot glue gun in the field to replace it with, so it basically grounded me.
Instead, after balancing the Libelle, I glued the weights to the foam walls using CA glue and covered the top of the battery bay with a wide piece of clear packaging tape which wraps down the outside of the pod. I conformed the tape to the contour of the balance weights and the foam surface so that the tape doesn’t hinder the closing of the pod lid. This holds the battery in very strongly without relying on the strength of a glue/foam bond, but still allows the battery to be easily removed if desired.
Nice custom power upgrade!